Thursday, August 16, 2012

Working on new material

Hi everyone! I just want to let you know that I am working on new material to post and that I have been a busy bee brainstorming...My goal is to bring more recipes with stories to inspire you!
xoxo,
Mahfam

Wednesday, March 28, 2012

My Mom (Part I)

My mom! (photo taken by my mother-in-law Gema (another story to add later, she's a photographer/artist)


I have been thinking about dedicating some posts to my mom--my number 1 mentor in Persian baking/cooking.  Yet, every time I would sit down in front of the computer I would find myself aimlessly searching the web for distractions.  I have been putting off this post for several months, most likely because I have wanted it to come out perfect.  Perfect in the sense of being able to capture who my mom is in one of my all time favorite Persian dishes.
"Ghormeh Sabzi" is THE dish that every Iranian kid/adult identifies their mom (and sometimes dad) with.  It's the comfort food, the celebration dish, and the dish that sits on the stove for hours until all the flavors are settled in together.  Ghormeh Sabzi for me (and my sisters) is the dish we identify our mom with.  It's the dish we ask her to make when she visits us from Arkansas.  It's also the dish she's given us the recipe to a thousand times; it's the dish that we've carefully watched her several times in the process of washing, cutting, sautéing, and stewing the herbs; and it's the dish we've been her little helpers to chopping, stirring, and tasting. Yet every time we crave it, and she's not around to make it for us, we almost always fail at making it the Perfect way she makes it.   
I will never make my "Ghormeh Sabzi" as perfect and delicious as hers, because when my mom cooks she adds her love for her family, her love for the ingredients, and her love for her culture into the simmering pot.  That is her special touch that has made us who we are today.

Ghormeh Sabzi is not the the prettiest Persian dish out there if you ask me.  It's green and it looks like grass shavings.  When I was little I would accompany my mom to the grocery store in search of all the ingredients to prepare for dinner.  During check out, the cashier ALWAYS asked my mom "what are ya gonna do with all this parsley, cilantro, fenugreek and spinach?" After my mom explained in detail the dish she was preparing, the cashier was even more confused and probably grossed out; and I, being a kid, was always a little embarrassed. Growing up Persian in Arkansas was hard enough, but trying to explain to your friends why your house smells of fenugreek, parsley, and cilantro would be even more embarrassing so my parents tried their best to not make certain dishes when our friends were over for dinner.  
*Honestly, to this day my mom still gets asked what she's preparing with all the ingredients she piles onto the cashier's table.


Ghormeh Sabzi... a Persian herb stew that is not as hard to make as it is to say.

Ingredients:
10 large bunches of parsley (if you ever see a woman destroying the neatly arranged pile of parsley and other herbs in search of large bunches, know that it is my mom or some other Iranian woman about to make ghormeh sabzi.)
2 large bunches of cilantro
1/3 - 1 pound of baby spinach
1 bunch scallions
2 tblsp. dried fenugreek or 1/4 cup fresh (fresh is hard to come by)
1 medium onion
1 pound of cubed beef (or lamb, or both--we used just beef)
4 cans of dark red kidney beans (check ingredients, make sure there's nothing artificial in the ingredients, should just be beans, salt and water!)
2 tblsp. turmeric
2 tblsp. dried lime or lemon powder (found in specialty stores or middle eastern stores, substitute juice of 3-4 lemons, but the dried powder stuff is what gives it a punch)
3 tblsp. oil
S/P to taste


First remove the thick stems from the parsley and cilantro (the bottom 2 inches) 
Then triple wash all of the parsley, cilantro and scallions.  My mom insisted I take a picture of the second rinsing of the herbs since she claims most people just run their herbs under running water.  Triple washing consists of soaking, draining, rinsing, and soaking x 3.  This method insures that all the grit is gone.
Then chop all of your green ingredients.  Not too fine and and not to course.  This process puts you in zen mode I think.  A big pile of herbs gives you time to wander off in daydream land.
My mom is ambidextrous.  She writes with her right hand-- chops and paints with her left.
Once all the "greens" are chopped, saute them in batches in a tablespoon of oil.
This day, Rumi was our little "stir" helper.
We had to give him his own pot to stir and Caspian, my mom's teacup Yorkie, managed to snag a few sauteed herbs.
Saute until the fresh green color turns dark.
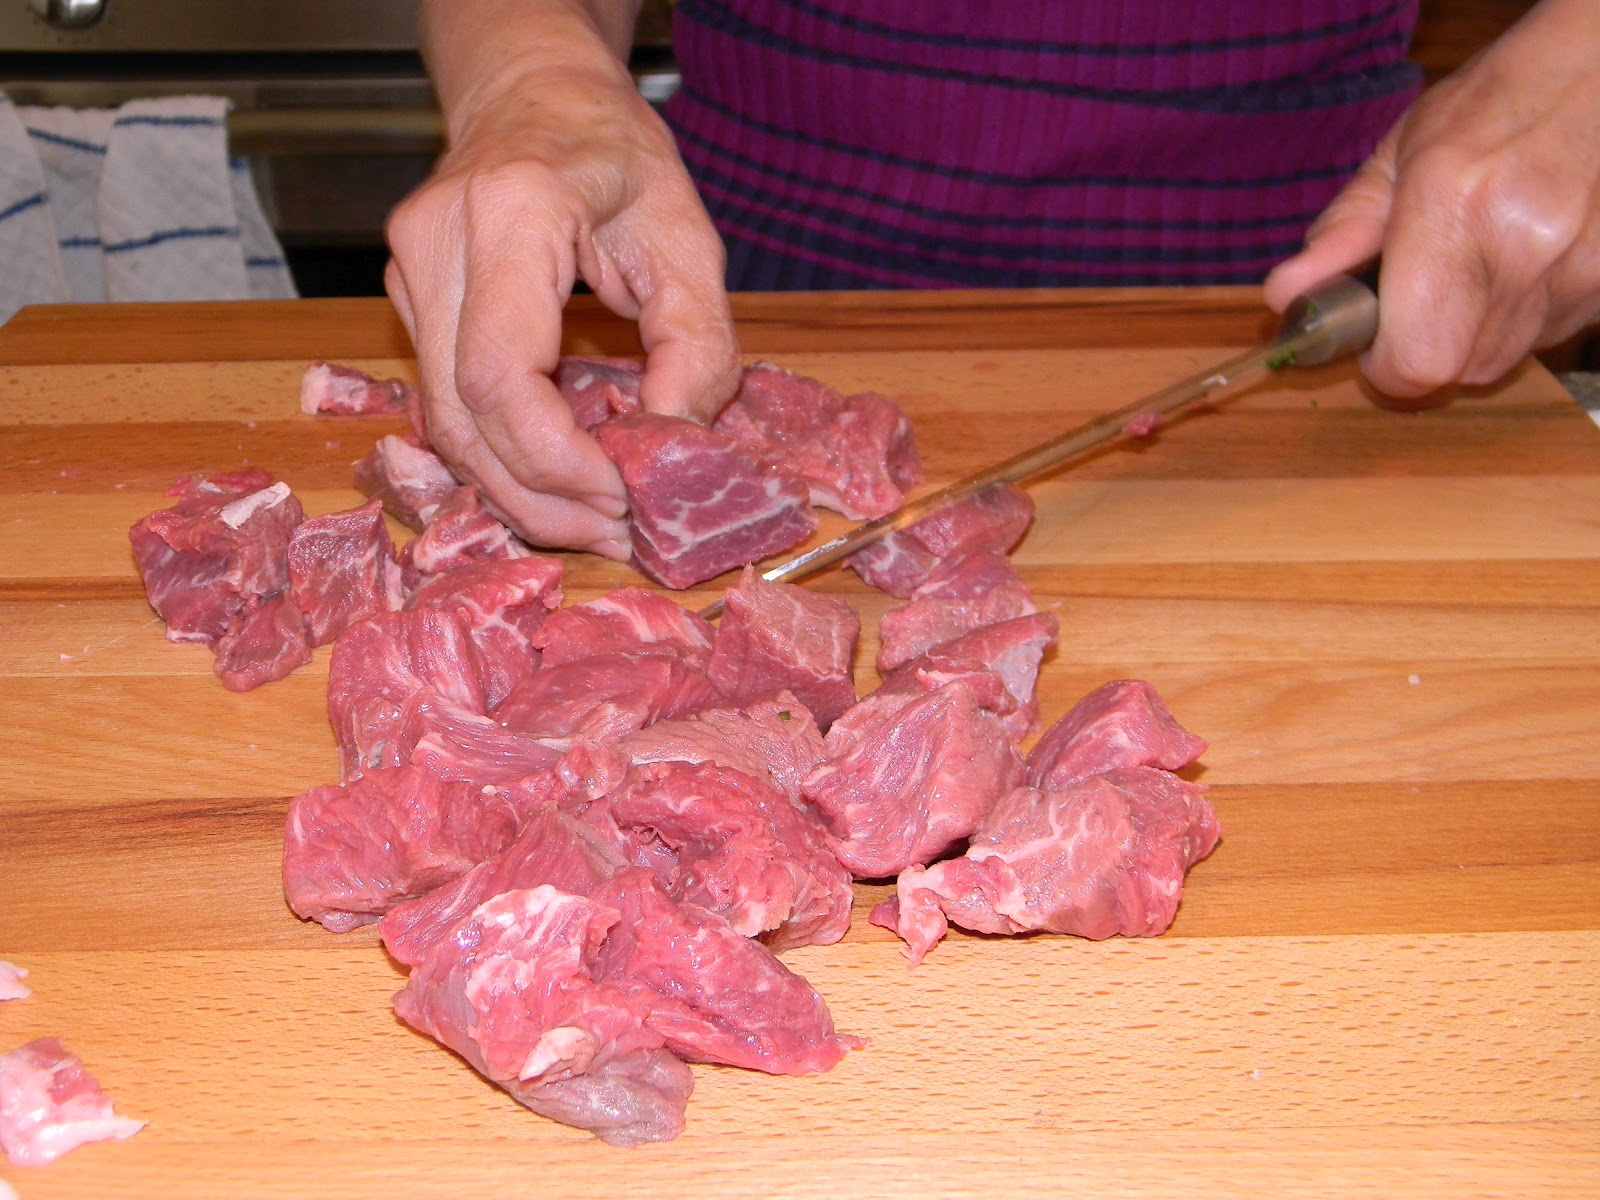
Meanwhile cut the meat into small cubes.  In Persian cooking, especially stews, meat is not the main attraction, it is used as a method to add flavor and body to the stew.  It can be omitted all together, but if you do so, be sure to use vegetable stock so the stew is still flavorful.  This can make a great vegan dish.
In a large stock pot, saute the beef in a little oil with the onions, pepper and turmeric.
Add all of the sauteed herbs, including the fenugreek, dried lime powder, and cover with water (about 4 cups). Put a lid on it, bring to a 10 minute boil and slowly simmer.  Stir every 30-45 minutes just to make sure nothing is sticking to the bottom.  If you feel it is, lower the simmering temperature.
Meanwhile, go about your business.  My mom is an artist and she is almost always making time for her art.  In Arizona, she has made herself a makeshift studio in the third garage where she spends hours creating works of art to be sold in galleries.
She reuses every type of plastic container from our recycling pile so she can store and mix paint.


After 2 1/2 hours of simmering, add the cans of kidney beans and simmer for another 1/2 hour.  Also at this point add salt.  My mom waits till the last minute because the salt from the canned kidney beans can sometimes make it too salty if you add salt in the beginning.  When all the flavors have settled, it should look like the picture above: dark green on the outer edges.

Serve it on top or on the side of basmati rice with radishes and more scallions on the side.  That's the way it is eaten in the Persian home.

Wednesday, November 2, 2011

Khoresh Karafs (Persian Celery Stew)


It's a been a while since my last post.  I'm so sorry!! October was randomly a busy month for me and "the household."  Well, I'm here now and I'm so excited to start this post with one of my favorite Persian stews--Celery Stew (Khoresh Karafs).
Usually when I pass by the celery in the vegetable section, I'm always tempted to just pick off 2-3 ribs-- which is all I ever need.  I never need the whole stalk and usually discard half of it because it goes limp in the "vegetable crisper drawer".   
Celery has never really been given credit as the main ingredient of any dish except for this recipe that I'm about to share with you.  Warning: if you are not a fan of celery's crisp, sour, herbaceous wonderfulness then this recipe is not for you.
Warning #2: I've also been told that celery is an aphrodisiac.  Another reason to give celery a try!  
There are two ways of making this stew.  This is my favorite version which incorporates the use of tomato paste and chicken thighs.
Serves 4-6
Ingredients:
(2) Stalks celery, preferably organic, cut at the base
(1) pound boneless, skin-less chicken thighs, or breast, cut into cubes
(2) bunches Italian parsley
(1) bunch cilantro
(1) medium yellow onion, diced
(1) can tomato paste
(1) teaspoon turmeric  
(1) lime, juiced
(1-2) teaspoons cayenne pepper (optional, but if you like spicy food ADD IT)
S/P to taste

1. Wash every rib of celery individually and set aside.
2. Triple wash the parsley and cilantro.  Making sure it is free of sand. Set aside. The best method for doing this is rinsing it once.  Letting it soak in a bowl of water until all the sand goes to the bottom.  Gently removing the herb from the bowl of water and rinsing it again in a colander.
3. Chop the celery into 1/4"-1/2" thickness.  Include the leaves. 


Finely chop the cilantro and the parsley.  It must be done by hand using a sharp knife.  Do not be tempted to run it in your food processor as it will not chop evenly and will turn out mushy when cooked.  
(This is a lesson I learned from my mom as I've been her right hand "wo-man" in the kitchen growing up and I always watched her chopping everything by hand for Persian stews.  I'd tease her saying it'd be much easier/faster in the food processor and then she'd go on telling me it must be done by hand and that if you're inviting other Persians to your home they will know the difference and "scoff" at your Persian stew making if you use the food processor.) I have yet to make any Persian stew for my Persian friends/family--I don't want to be "scoffed" at.  Anyway...

In a large pot heat a tablespoon of oil.  Saute the chopped parsley and cilantro for 2 minutes.  Add the celery and saute for 4-5 minutes.  Pour the contents into a heat proof bowl and set aside.


In the same pot, heat another tablespoon of oil and saute the diced onion for 2-3 minutes.  Add the cubed chicken and saute for 4-5 minutes.  At this point add all your other seasonings: turmeric, tomato paste, lime juice s/p, and the optional cayenne.


 Pour the reserved celery, and herbs back into the pot.  Give it a good stir.  As you see in the picture above, I have a little kitchen gnome that helps me with the stirring.  Add about 2 cups of filtered water or chicken stock and bring to a boil for 10 minutes. 


Reduce to a simmer, cover and cook for 2-3 hours on low heat.  Check it every now and then with a good stir.  You'll know the stew is ready once all the ingredients have "settled" together.


Serve it with steamed saffron basmati rice and "tahdiq" (a.k.a. the rice on the bottom of the pot that is crispy)


This is a great fall/winter stew.  It can even be enjoyed on its own or with crusty bread.
Nousheh jan!


Vegan option: The omission of chicken in this stew makes it vegan.  You can substitute your protein by using firm tofu that can withstand the process of "stewing" or adding a can of garbanzo beans and kidney beans.

Thursday, September 22, 2011

The Perfect "meat~n~ potatoes" Sandwich


~Persian Kotlet Sandwich~

Which came first? The Persian Kotlet made with ground beef and grated potatoes or the Polish Kotlet made with pork that has been pounded thin then dredged in seasoned flour? 
I'm not exactly sure and I really don't care.   I do know this, Persian Kotlet was the staple "go-to" sandwich when we'd go on picnics and road trips growing up.  
I was feeling nostalgic the other day.  Reminiscing my move to Arizona after college.  Leaving behind my childhood and early adulthood in Arkansas, all for a new beginning.  I will never forget the long road trip ahead of me: My little black Civic packed to the brim of some of my belongings, my dad driving--eager to get on the road, as he loves road trips and myself feeling bittersweet about this big change as I wave good-bye to my mom early in the morning.
We had close to 2 full days ahead of us with plans of only stopping for gas.  The night before my mom prepared our lunch/dinner to last us the two days we would be on the road.  Persian Kotlet was on the menu for our road trip.  I laugh as I type this because I remember sitting in the passenger side making my dad a sandwich and hoping not to spill anything in my new car--I somehow maneuvered stuffing the pita with a kotlet, tomatoes, onions, cilantro, parsley, spicy pickles and squeezing lime juice all while my dad was driving.  
I can now put "sandwich maker in a moving car" on my resume--it takes some serious skills to make a sandwich in a car.
By the second day, we were pretty bored with eating the same sandwich, but we had a long day ahead of us and we did not want to stop for food.  We were out of vegetables by the second day so I improvised by using ketchup packets my mom had put in the cooler.  It definitely lacked the vegetables, but it was still tasty with ketchup.  By the time we got to Flagstaff, AZ from New Mexico, we treated our selves to a little quant restaurant and joked how we will NOT be eating kotlet for months to come.

Well, I have had my fair share of this delicious picnic/potluck/road trip sandwich, although I have never made it.  So when I called my sister Mahsa for the recipe, (She has my mom's recipe), I was very excited to make it.  I almost felt like I should go into my little black Civic and eat it like I had with my dad.

This recipe is our family recipe.  Some Persian families cook the potatoes first, run it through a rice mill and then mix it with the ground beef before pan frying.  We grate the potato raw, mix it with the ground beef and then pan fry.  It literally comes out looking and tasting like hash browns, but with meat in it.  Crispy on the outside and soft inside.

Also, the meat to potato ratio is 1:1, however, I like the way my sister uses more potato and just a little bit of meat. This recipe is more like a 5:1.

~Persian Kotlet~
makes 24

5 pounds Russet potatoes, peeled and grated
1 pound of organic ground beef
1 medium onion, grated
1 egg, lightly beaten
3 tablespoons turmeric
1/4 canola oil
S/P


Grate the potatoes in a food processor with the grater attachment.  Place the potatoes in a big bowl.
Work fast as the potatoes will oxidize on you.  I squeezed (1) whole lime and tossed it to buy me some time.  You will notice that the potatoes will give out some water.  Working in batches, place some of the grated potato in a cheese cloth or kitchen towel and wring out until most of the water is drained.  Continue doing so for the entire batch
In a separate bowl mix the beef with the egg, turmeric and s/p.
Once the potatoes have all been drained of their liquid, add the grated onion to the mix with s/p.  Then add the seasoned beef to the grated potato and onion mixture.  Since there is more potato than beef, it will take a while to mix by hand, but it will all get incorporated.
Then form into oval shaped patties--this part is important that it is oval and not round.  Place them on a sheet tray. About 8 will fit on the sheet tray, cover with plastic wrap, and continue piling on top of each other--they won't stick since you are covering each layer with plastic wrap.
Refrigerate for at least an hour to set.
Prepare a medium sized skillet filled with 1/4 cup oil and heat on medium high
Gently place the kotlet in the pan.  You may need to use a splatter guard to prevent getting splashed with oil--I still got splashed though.
Pan fry until golden on both sides. I flipped the kotlets 2-3 times during the pan-frying process to get an even golden color to them.
Drain them on a rack over paper towels and a sheet pan.  Sprinkle with a little sea salt just when you take them out while they are still hot.

Assemble the kotlet in a pita pocket or your favorite bread.  I topped mine with diced, onions, tomatoes, chopped parsley/cilantro, pickles and squeezed lots of lime on it.

Enjoy!  
I know I did and I didn't have to worry about getting my car dirty this time.

Wednesday, September 14, 2011

Sauvignon Blanc Roast Chicken with "end of the season" vegetables


My inspiration to make this dish came from my favorite grocery store SPROUTS Farmer's Market.  It's a local market that started back in 2002 and has now expanded to CA, CO and TX.  They have a great meat department with friendly butchers.  Sprouts is the only place I trust their ground meat since they grind it in house and if you're nice to them they'll grind to order--which I do.  Also, the other stores I go to (warehouse stores and "name-brand" super markets) get their ground meat in already ground--they just run it through the grinder to make it look fresher--trust me, I asked the butcher at those stores and they told me). Another great thing is that their chicken is all natural with no chemical enhancer, sodium based solutions, or growth hormones and stimulants.  I take my meat seriously when I'm feeding my friends and family!
I am also tempted to buy fruits and vegetables by the pounds there because they're not only inviting with their sweet fragrance, but it is the only store in my valley with affordable prices.  I usually stop my temptations of over hoarding by reminding my self  it's only the 3 of us and I have no plans of having an army over for lunch or dinner. 
Ok, so maybe my inspiration to make this particular lunch is as a result of my over hoarding of affordable, market fresh vegetables.  Earlier in the week I had bought a few pounds of tomatoes for .67 cents/pound, 3 RED bell peppers for $1(can't beat that!), couple pounds of perfect summer zucchini for .88 cents/pound, celery stalk for.88 cents, eggplant for $1, a pound of organic carrots for $1 (don't get me started on fruit...) get my drift? 
Because of my addiction for over buying affordable vegetables, today I had to try to come up with recipes to use them before they went bad and this is what was for lunch thanks to Sprouts:

Sauvignon Blanc Roast Chicken with "end of the season" vegetables:

For the chicken:
(1) whole chicken about 6 pounds, washed and pat dry
2 ribs of celery, cut in thirds-then halved
2 carrots, cut in thirds-then halved
1/4 red onion chopped 
Seasoning:
Salt/Pepper
teaspoon of paprika, chili flakes, angelica powder, dried ginger
Fresh seasoning:
tablespoon chopped fresh parsely, mint, and 3 cloves garlic

Pre-heat oven to 420 degrees:


In a heavy-duty skillet (cast iron or roasting pan) pour a tablespoon of oil (I use grape seed oil), then place the vegetables on the bottom of the pan.  Sprinkle with S/P.
The vegetables have 2 functions: they'll keep your chicken from sticking to the pan, and they'll add flavor to the broth produced while roasting as you baste.


Rub the chicken with dry/fresh seasoning inside the cavity, under the skin (gently pull back the skin as you do this), and over the skin.  Truss your chicken with kitchen twine, place it in the pan on top of the vegetables and rub it with a teaspoon of oil.


Cover the chicken in 2 layers of cheese cloth that has been dipped in about 1/4 cup of white wine--I used sauvignon blanc for its crisp, stone fruit taste.  Using cheese cloth (as I learned from Martha Stewart's Thanksgiving edition back in the day) will keep your chicken from drying out while it's roasting. 


 On the stove top, prepare a bath of equal parts wine and chicken stock (1 cup each) with half a stick of butter, and fresh parsley and celery.  Keep it on medium-low heat, and use this liquid to baste the chicken every 15 minutes or so.

Roast the chicken for about 20 minutes at 420 (convection) and then bring it down to 350-375 for the remainder of the time while you continuously baste the chicken


For the roasted vegetables you will need:

3 Roma tomatoes, cut in half
1 Red onion chopped
2 zucchini's cut in half, then chopped
2 red peppers, membrane and seeds removed, chopped
1/2 medium eggplant, chopped 1/4" thick
1 garlic bulb cut in half

Place in big bowl, drizzle with olive oil and toss with salt and pepper.  Place it in a sheet pan and roast for 30-40 minutes or until roasted.


The chicken is roasting, continuously basted, and protected from drying out by the cheese cloth.


Once the chicken is cooked, juices run clear and thermometer reads 180 degrees in the thigh, remove it from the oven.  Take the cheese cloth off and let it rest.  When I did this, the breasts were not as brown as I like it to be, so I placed it under the broiler at 550 for 5 minutes and it came out crispier than you see in the above photo.


Serve the finished result on a platter, with the chicken cut in quarters.
This lunch for 2.5 cost me $8 with left overs for dinner!
Thanks Sprouts!
Did I mention this lunch was also gluten-free?...

Saturday, September 10, 2011

Under construction

My blog is under construction...trying to find a layout that best works.  Please give me suggestions and ideas!!! Would love to hear them.
Thanks,
Mahfam

Thursday, September 8, 2011

It's taco Tuesday, except today isn't Tuesday!


Here's to all you taco lovers out there!
  
By now you have probably realized how obsessed I am with tacos.  I'm not talking about Taco Bell tacos either--except I have had my fair share of that place when in college.  I'm talking about home-made tacos.  The kind that has your special touch to it.  The kind where you can put anything and omit anything you'd like in it. And, the kind that when you've finished preparing all the toppings/fillings you can sit down and enjoy 2, or 3 or 7 tacos without feeling guilty of who's counting--because you're at home and who cares if you just ate the 7th taco, you made it, it's healthy. Be proud of your taco!

What I like about tacos is that they're versatile. You can seriously put any "country" into a taco.  So like my other taco recipes here and here that I've blogged about, this one is another version with similar spices, except I've also added a Chilean technique in braising the meat.  
Did I mention my husband is Chilean? Oh, I didn't? Well, my husband is Chilean-actually his parents are from Chile-he was born in the States.  So when I met his wonderful family for the first time while we were dating, I was intrigued by all the delicious foods his mom would make for us.  One such dish called Carne Mechada is my favorite.  It's made by braising beef in red wine and aromatic vegetables until it's tender and flavorful.  
So my inspiration for making these tacos are from both cultures.  Hmmm, maybe I should call it the Rumi taco--hey, he is both Chilean and Persian.

Okay, so here's what you need for the "Rumi Taco"

Serves 2 (maybe 1)
1/2 pound to 1 pound bone-less leg of lamb steak (it's what I used, you can use any cut of beef, chicken, or lamb)
Spices: 1 teaspoon turmeric, paprika, cumin, dried mint, dried dill, salt/pepper
2 carrots roughly chopped
2 ribs celery roughly chopped
1 medium white onion roughly chopped
2 clove garlic, crushed whole
1 Persian dried lime found at specialty food markets (optional)
4-6 oz. red wine (I used a Chilean wine of course-Carmenere is the grape synonymous to Chilean wines)


Rub the spices all over.

 In a heated pot with 1 tablespoon oil (I've been using grape seed oil lately), sear all sides of the meat. Then remove the meat to saute the vegetables.
 All your aromatic vegetables should be sauteed for about 3 minutes. Don't care about having evenly cut vegetables since you will discard them later.
 Deglaze with the wine, scraping the bottom of the pan with a wooden spoon. Submerge the meat back into the pot, placing some vegetables on top.
 Cover, bring to a boil for 10 minutes, then simmer for 3 hours until the meat is fork tender and juicy.
Then remove the meat. Strain the vegetables in a colander and reserve the juice.
Cut the meat in small cubes or shred. Place in a shallow bowl and pour the reserved juice over it.
 My personal taco bar: Persian "salsa": cucumbers, cilantro, red onion, tomatoes tossed in minted-citrus vinaigrette.
Sheep's Milk Feta cheese, Shaved radishes, and garlic-yogurt.
 Warm your corn (or flour) tortillas in a hot skillet w/o oil until toasted, yet pliable and assemble your taco the way you like it.
Eat it like no one's watching! Except I purposely posed for this picture because I knew you'd be watching. Afterwards, I ate like a pig :)